Linux beginner's guide

Your first ACMX session.

This guide takes you from downloading the Flatpak to opening a shader library, choosing the OpenGL or Vulkan backend, running an effect, and finding the creative tools inside the interface.

ACMX / shader libraryLinux
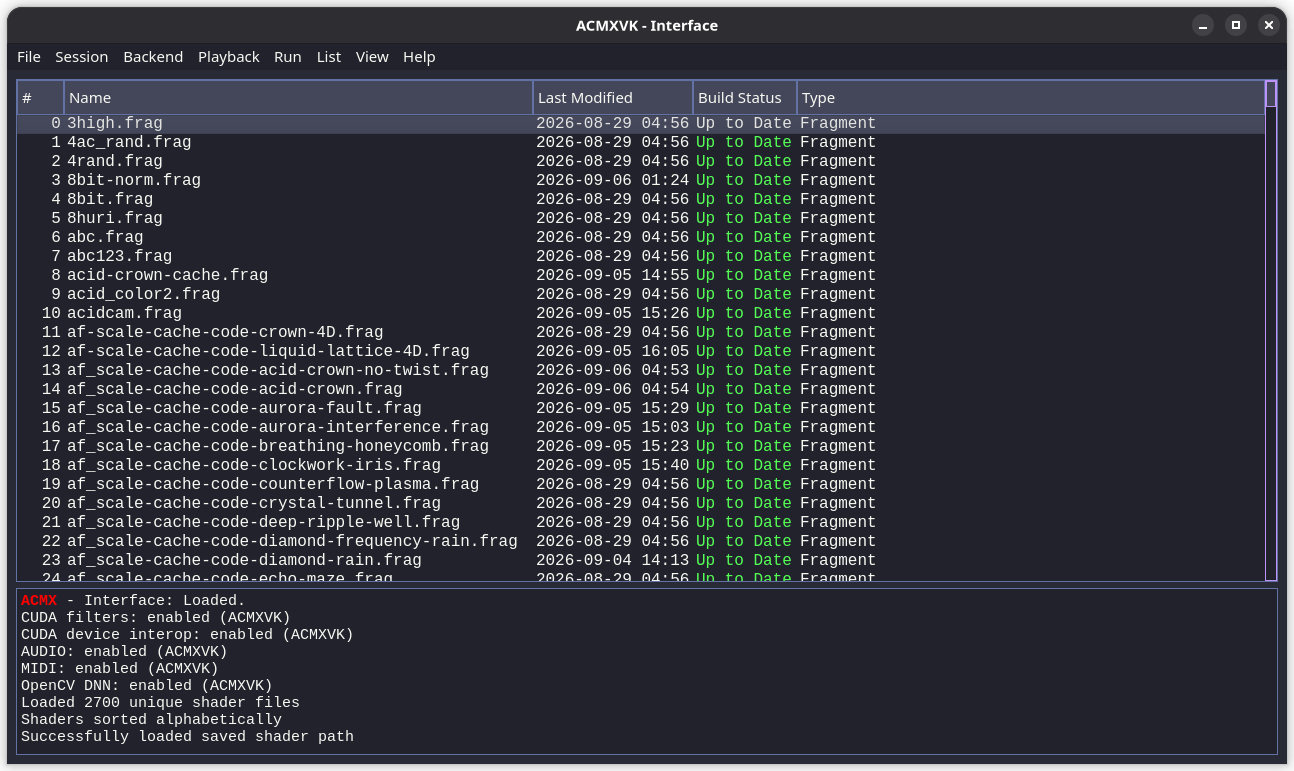
ACMX main interface with a shader library, build status, and runtime log
// Part one

Install ACMX with Flatpak.

Flatpak packages the application and most of its dependencies together. You do not need to compile ACMX to follow this tutorial.

Make sure Flatpak is installed

Many Linux distributions include Flatpak already. Open a terminal and run the command below. If it prints a version number, continue to the next step.

flatpak --version

If the command is missing, install the package named flatpak with your distribution's software center or package manager, then sign out and back in.
Download the ACMX bundle

Download ACMX2.flatpak and leave it in your Downloads folder. The filename retains the historic ACMX2 name, but the package contains the shared interface and both ACMX2 and ACMXVK backends.

Install it for your user account

Open a terminal, move to Downloads, and install the file. Flatpak may ask you to confirm the runtime packages it needs.

cd ~/Downloads
flatpak install --user ./ACMX2.flatpak

Launch the interface

Look for ACMX in your desktop's application menu. You can also launch it from a terminal; terminal output is useful if you ever need to diagnose a problem.

flatpak run io.github.lostjared.ACMX2
// Part two

Understand the main window.

The large upper table is your shader library. The lower panel is the live log, where build commands, backend messages, and errors appear.

ACMX main interface showing shader rows and a runtime log
The main library browser. Green “Up to Date” entries are ready to run.
01 / Main workspace

Select, build, and run shaders

Each row is a shader. The columns identify its name, last modification time, build health, and type. Select a row and use the Run menu to start it. For ACMXVK source libraries, Build compiles fragment and compute GLSL into SPIR-V. Read the log after every build or launch; successful commands and actionable errors appear there.

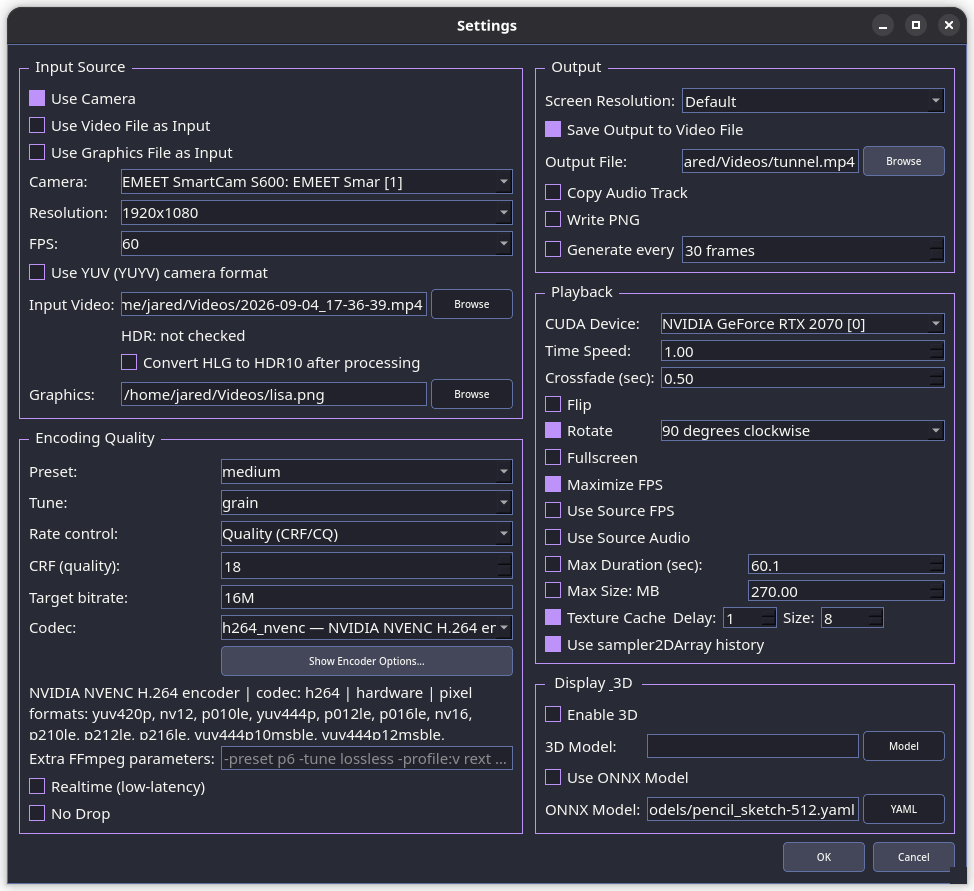
ACMX Settings window with input, output, recording, playback, display, and model options
Settings brings input, recording, playback, graphics, and output choices together.
02 / Settings

Choose your source and output

Use Camera for a live device, Video File for existing footage, or Graphics File for a still image. Camera resolution and frame rate can be selected independently from the preview. The right side controls output location, screen resolution, frame rate, playback, CUDA when available, 3D mode, and recording limits. Beginners can leave most values at their defaults.

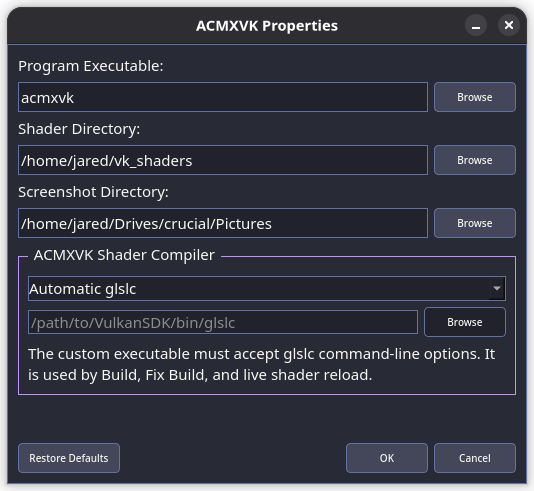
ACMXVK Properties dialog with program, shader, screenshot, and compiler paths
Backend properties tell the interface where ACMXVK and its working files live.
03 / Backend setup

Point ACMXVK at a writable shader library

The program path normally resolves automatically in the Flatpak. Shader Directory is the library you browse and build, Screenshot Directory is where captured frames are saved, and Shader Compiler chooses glslc. Keep your editable shaders somewhere inside your home folder so the application can write compiled files beside the library.

// Part three

Tour the creative controls.

You do not need every tool on day one. These screenshots show what each area does so you know where to return when your project grows.

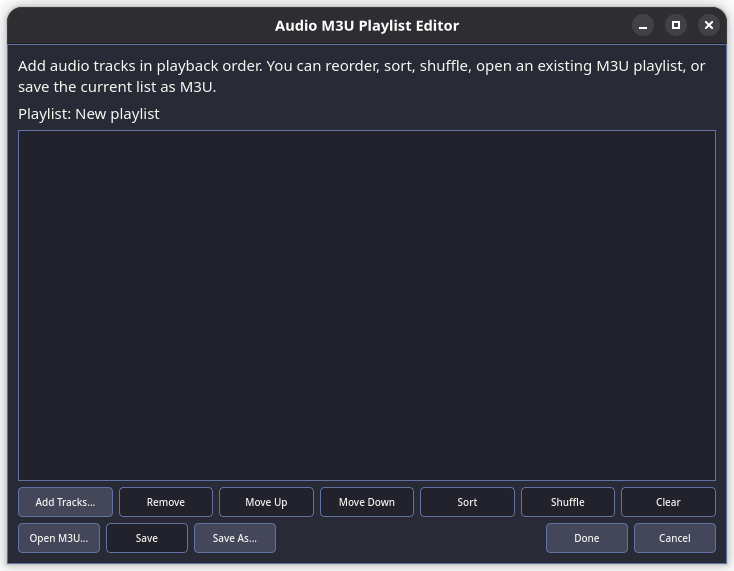
Audio M3U Playlist Editor
Add, reorder, shuffle, save, and reopen audio tracks.
04 / Audio playlist

Prepare music for a session

The M3U editor assembles an ordered list of audio files. Add individual tracks, move them up or down, shuffle the order, or save the playlist for later performances.

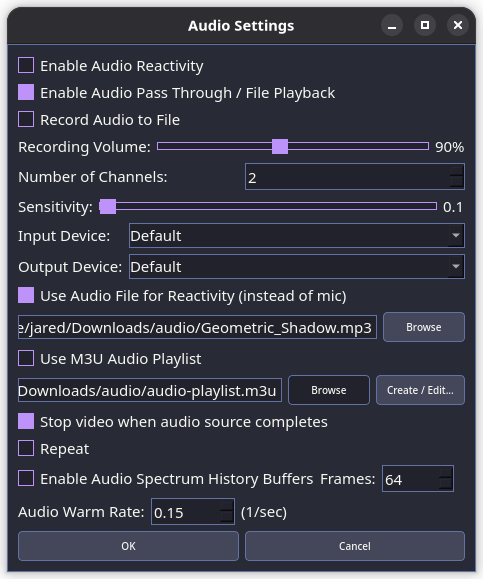
Audio Settings dialog
Choose how audio drives, monitors, and accompanies the visuals.
05 / Audio settings

Make shaders react to sound

Enable Audio Reactivity for microphone or file analysis. Pass Through lets you hear playback, while Record Audio to File includes sound in the finished recording. Input/output devices, sensitivity, warm-up, playlists, repeat, and audio-history depth are configured here.

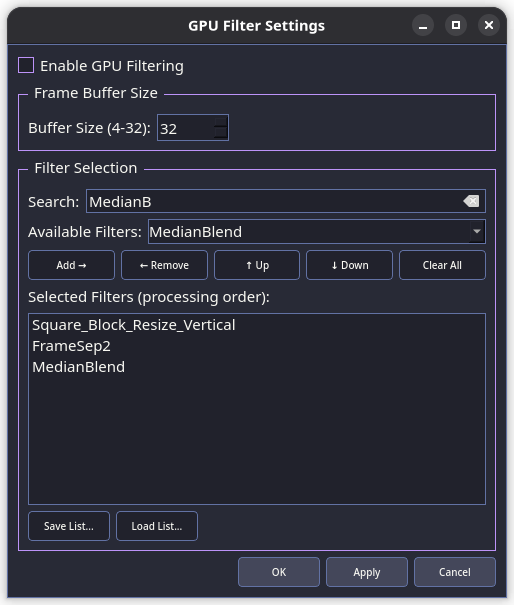
GPU Filter Settings dialog
Combine compatible GPU filters into an ordered processing list.
06 / GPU filters

Stack optional image filters

When the optional GPU filter library is available, search for filters and add them to the selected list. The order matters: each filter receives the previous filter's result. Frame Buffer Size controls how much temporal frame data compatible effects can retain.

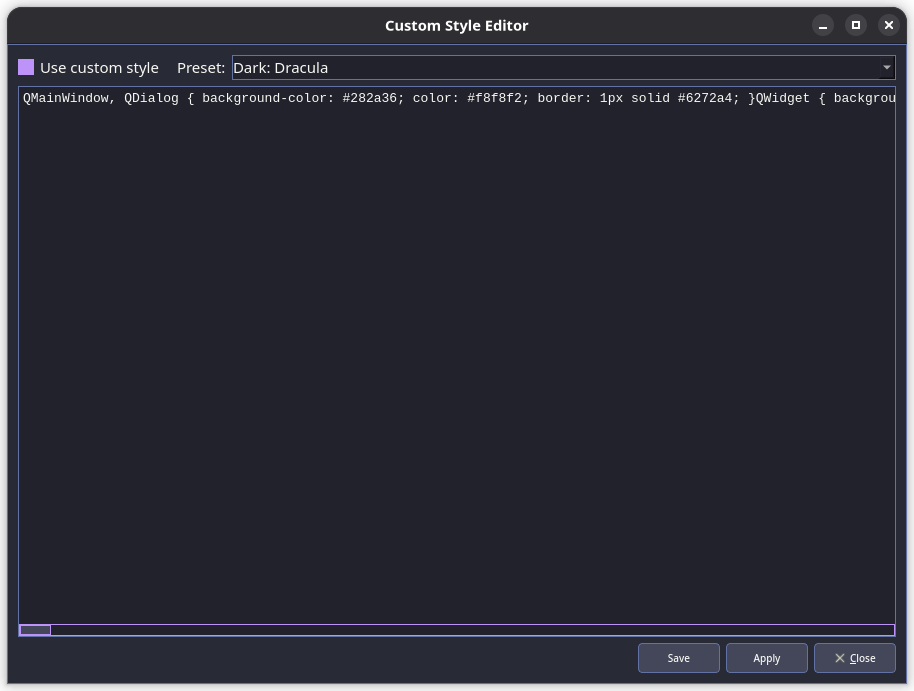
Custom Style Editor with Qt style text
Change the interface appearance with a Qt stylesheet.
07 / Interface style

Customize the workspace

The style editor accepts Qt stylesheet rules. Pick a preset, adjust colors and widget rules, then Apply to preview it. Save stores the style for reuse; disabling custom style restores the normal appearance.

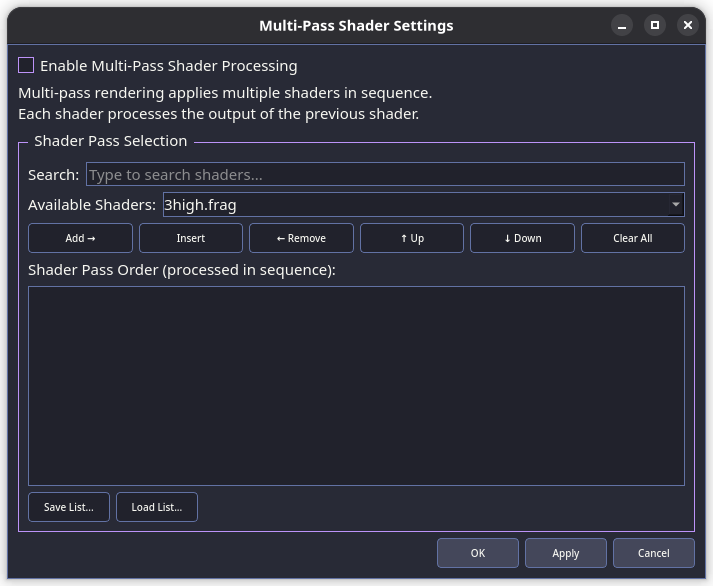
Multi-Pass Shader Settings dialog
A multipass chain processes shaders from top to bottom.
08 / Multipass

Build effects from several shaders

Enable multipass processing, search the available library, and add passes in sequence. Every pass consumes the previous pass's output. Use the arrow controls to reorder the chain and save useful combinations as reusable lists.

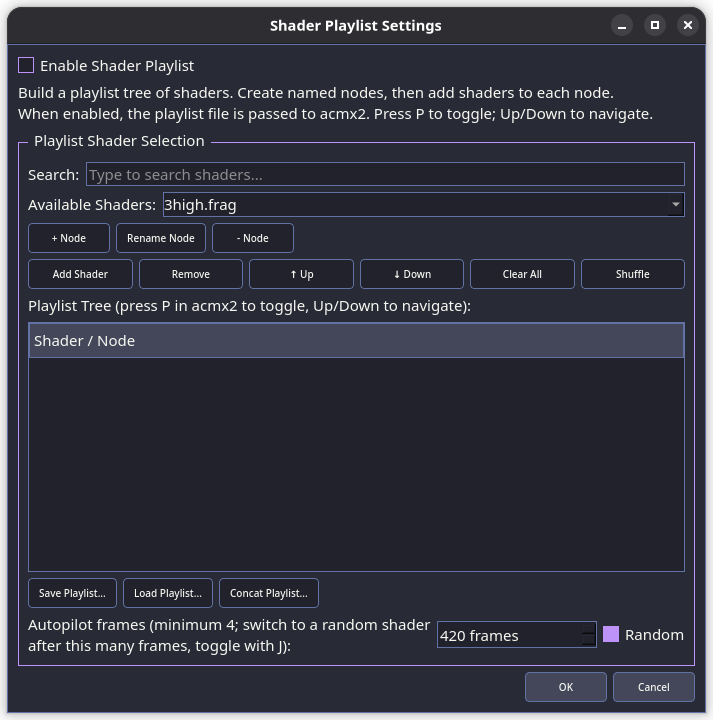
Shader Playlist Settings dialog
Playlist nodes can contain one shader or a complete multipass effect.
09 / Shader playlists

Move automatically between effects

Add shaders to named nodes, arrange their order, and save the playlist. Autopilot changes nodes after a chosen number of frames; Random varies the route. During a live session, the playlist keys let you move manually between nodes.

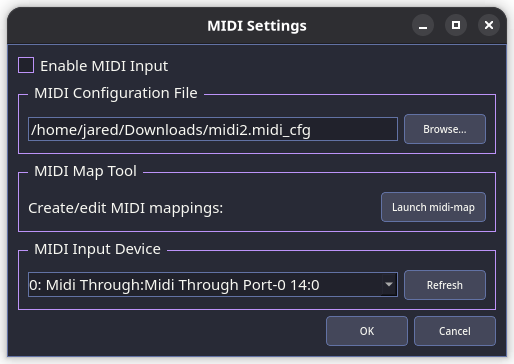
MIDI Settings dialog
Select the controller, mapping file, and mapping editor.
10 / MIDI input

Connect knobs, sliders, and buttons

Enable MIDI, select the connected input device, and load a .midi_cfg mapping. Refresh rescans devices after plugging one in. Launch midi-map opens the companion tool for assigning physical controls to ACMX actions and shader uniforms.

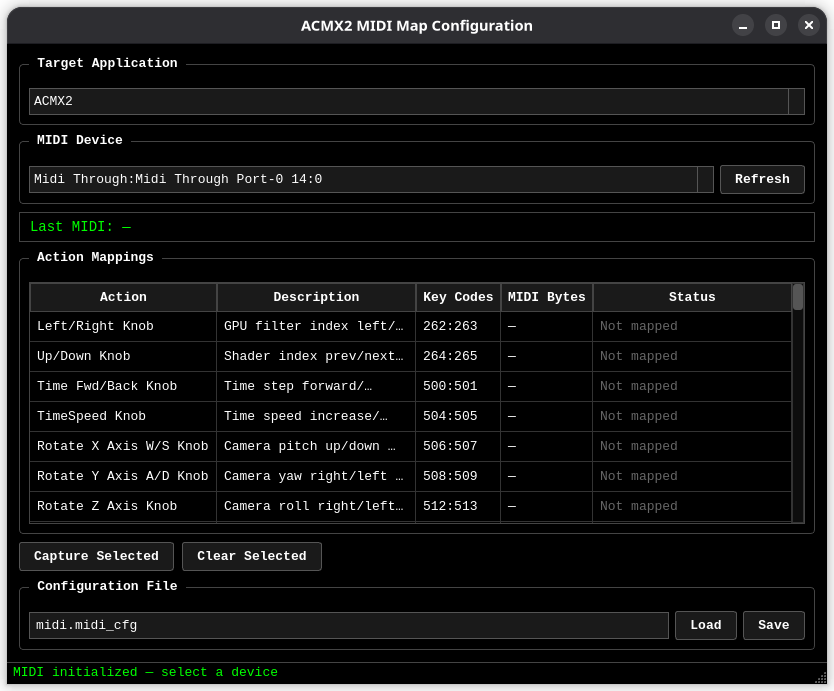
ACMX MIDI Map Configuration application
The mapper learns control codes from your physical MIDI device.
11 / MIDI mapper

Teach ACMX your controller

Choose the target application and MIDI device, select an action, then move or press the intended hardware control. The learned key and byte values appear in the table. Save the configuration and select that file back in MIDI Settings.

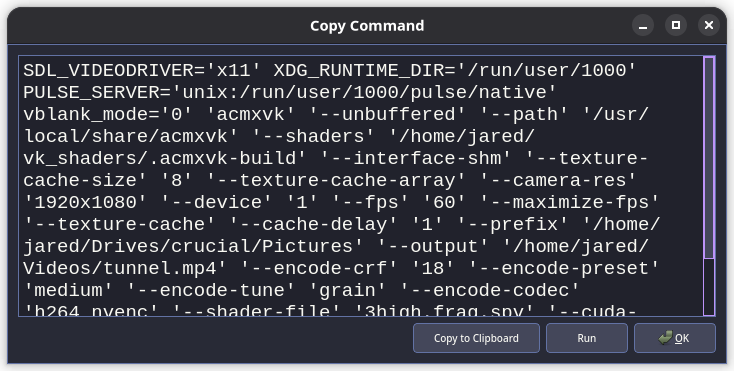
Copy Command dialog showing generated ACMXVK arguments
Inspect, copy, or run the exact command generated by the interface.
12 / Command preview

See what the interface will execute

This dialog is useful for learning the command-line application and reproducing a session in a terminal. Copy to Clipboard preserves the full command; Run launches it directly with the current interface settings.

Shader Library Folder Selector
Choose where a new source library will be created.
13 / New library

Start an editable shader collection

Browse to an empty or dedicated folder. The optional default shader gives you a minimal working fragment shader, while the manifest option creates the library.json metadata used by the ACMXVK builder.

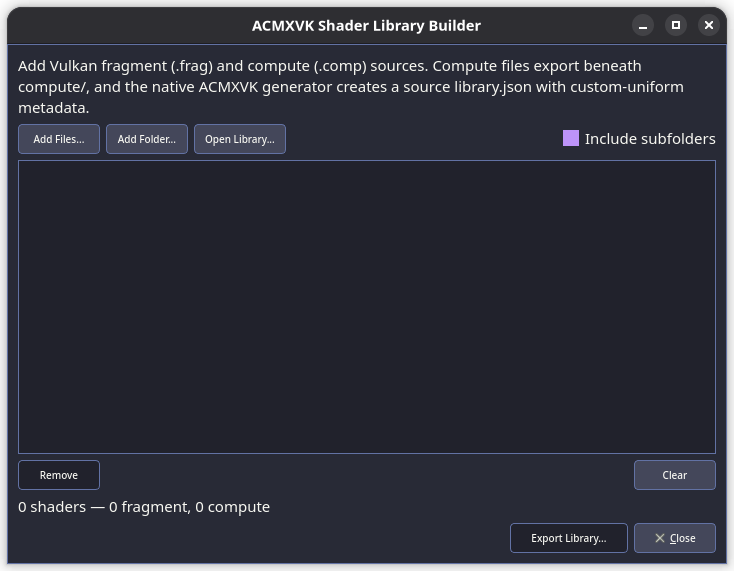
ACMXVK Shader Library Builder
Collect source files and export a validated ACMXVK manifest.
14 / Library builder

Turn source folders into an ACMXVK library

Add fragment and compute files individually or import whole folders. Include subfolders when your library is organized into categories. Export Library creates the manifest and preserves the shader type and custom-uniform metadata ACMXVK needs.

Create New Shader dialog
Create a fragment, compute, cache, or passthrough shader from the interface.
15 / New shader

Begin with working boilerplate

Name the source, choose Fragment or Compute, and include the default code when you want a known-good starting point. Cache shaders receive history textures for effects that depend on earlier frames.

Custom Uniforms window with ranges, sliders, values, and copy buttons
Expose shader parameters as named controls without hard-coding values.
16 / Custom uniforms

Give a shader live controls

Create a name, minimum, maximum, and step, then assign it to an available uniform slot. Each control gains a slider and exact numeric value. Copy produces the GLSL location expression to paste into the source; Delete removes the mapping from the manifest.

Find in Shader Files dialog
Search shader names and source code with regular expressions.
17 / Library search

Find code across a large collection

Enter a regular expression to search the active library. Results identify the shader, matching line, and source text; open a result to jump into the editor. Case-sensitive matching is optional.

Empty Media Metadata Viewer
Open a media file to inspect it before starting a render.
18 / Media inspector

Choose a file to analyze

The metadata viewer starts empty. Browse to a video or audio file and choose Analyze. It does not modify the file; it reads the container and stream information that can help you choose resolution, frame rate, audio, and encoding settings.

Media Metadata Viewer showing video format and stream details
Container, video, audio, dimensions, frame rate, and codec details are shown in a tree.
19 / Media details

Understand the source before processing

The expanded result reports duration, bitrate, format, stream count, dimensions, pixel format, frame rate, color information, and codec names. The Markdown, HTML, and Text tabs make the report easy to copy into notes or a bug report.

Built-in Uniform Reference showing GLSL type, availability, declaration, and example
The built-in reference documents the values ACMX supplies to shaders.
20 / Shader reference

Learn the shader interface inside the app

Select a built-in uniform to see its GLSL type, backend availability, declaration, meaning, and example expression. This is the quickest reference when writing effects that depend on time, resolution, audio, mouse input, history, textures, or samplers.

// Watch it happen

ACMX demonstrated on Linux.

See the interface and real-time workflow in motion before building your first larger session.

// Keep exploring

Where to go next.

Read the documentation

Learn every option, keyboard control, shader binding, and backend feature.

Open ACMX docs ↗