🎨 Acid Cam Dev Container
Complete Setup Guide for Real-Time Video Effects & Glitch Art
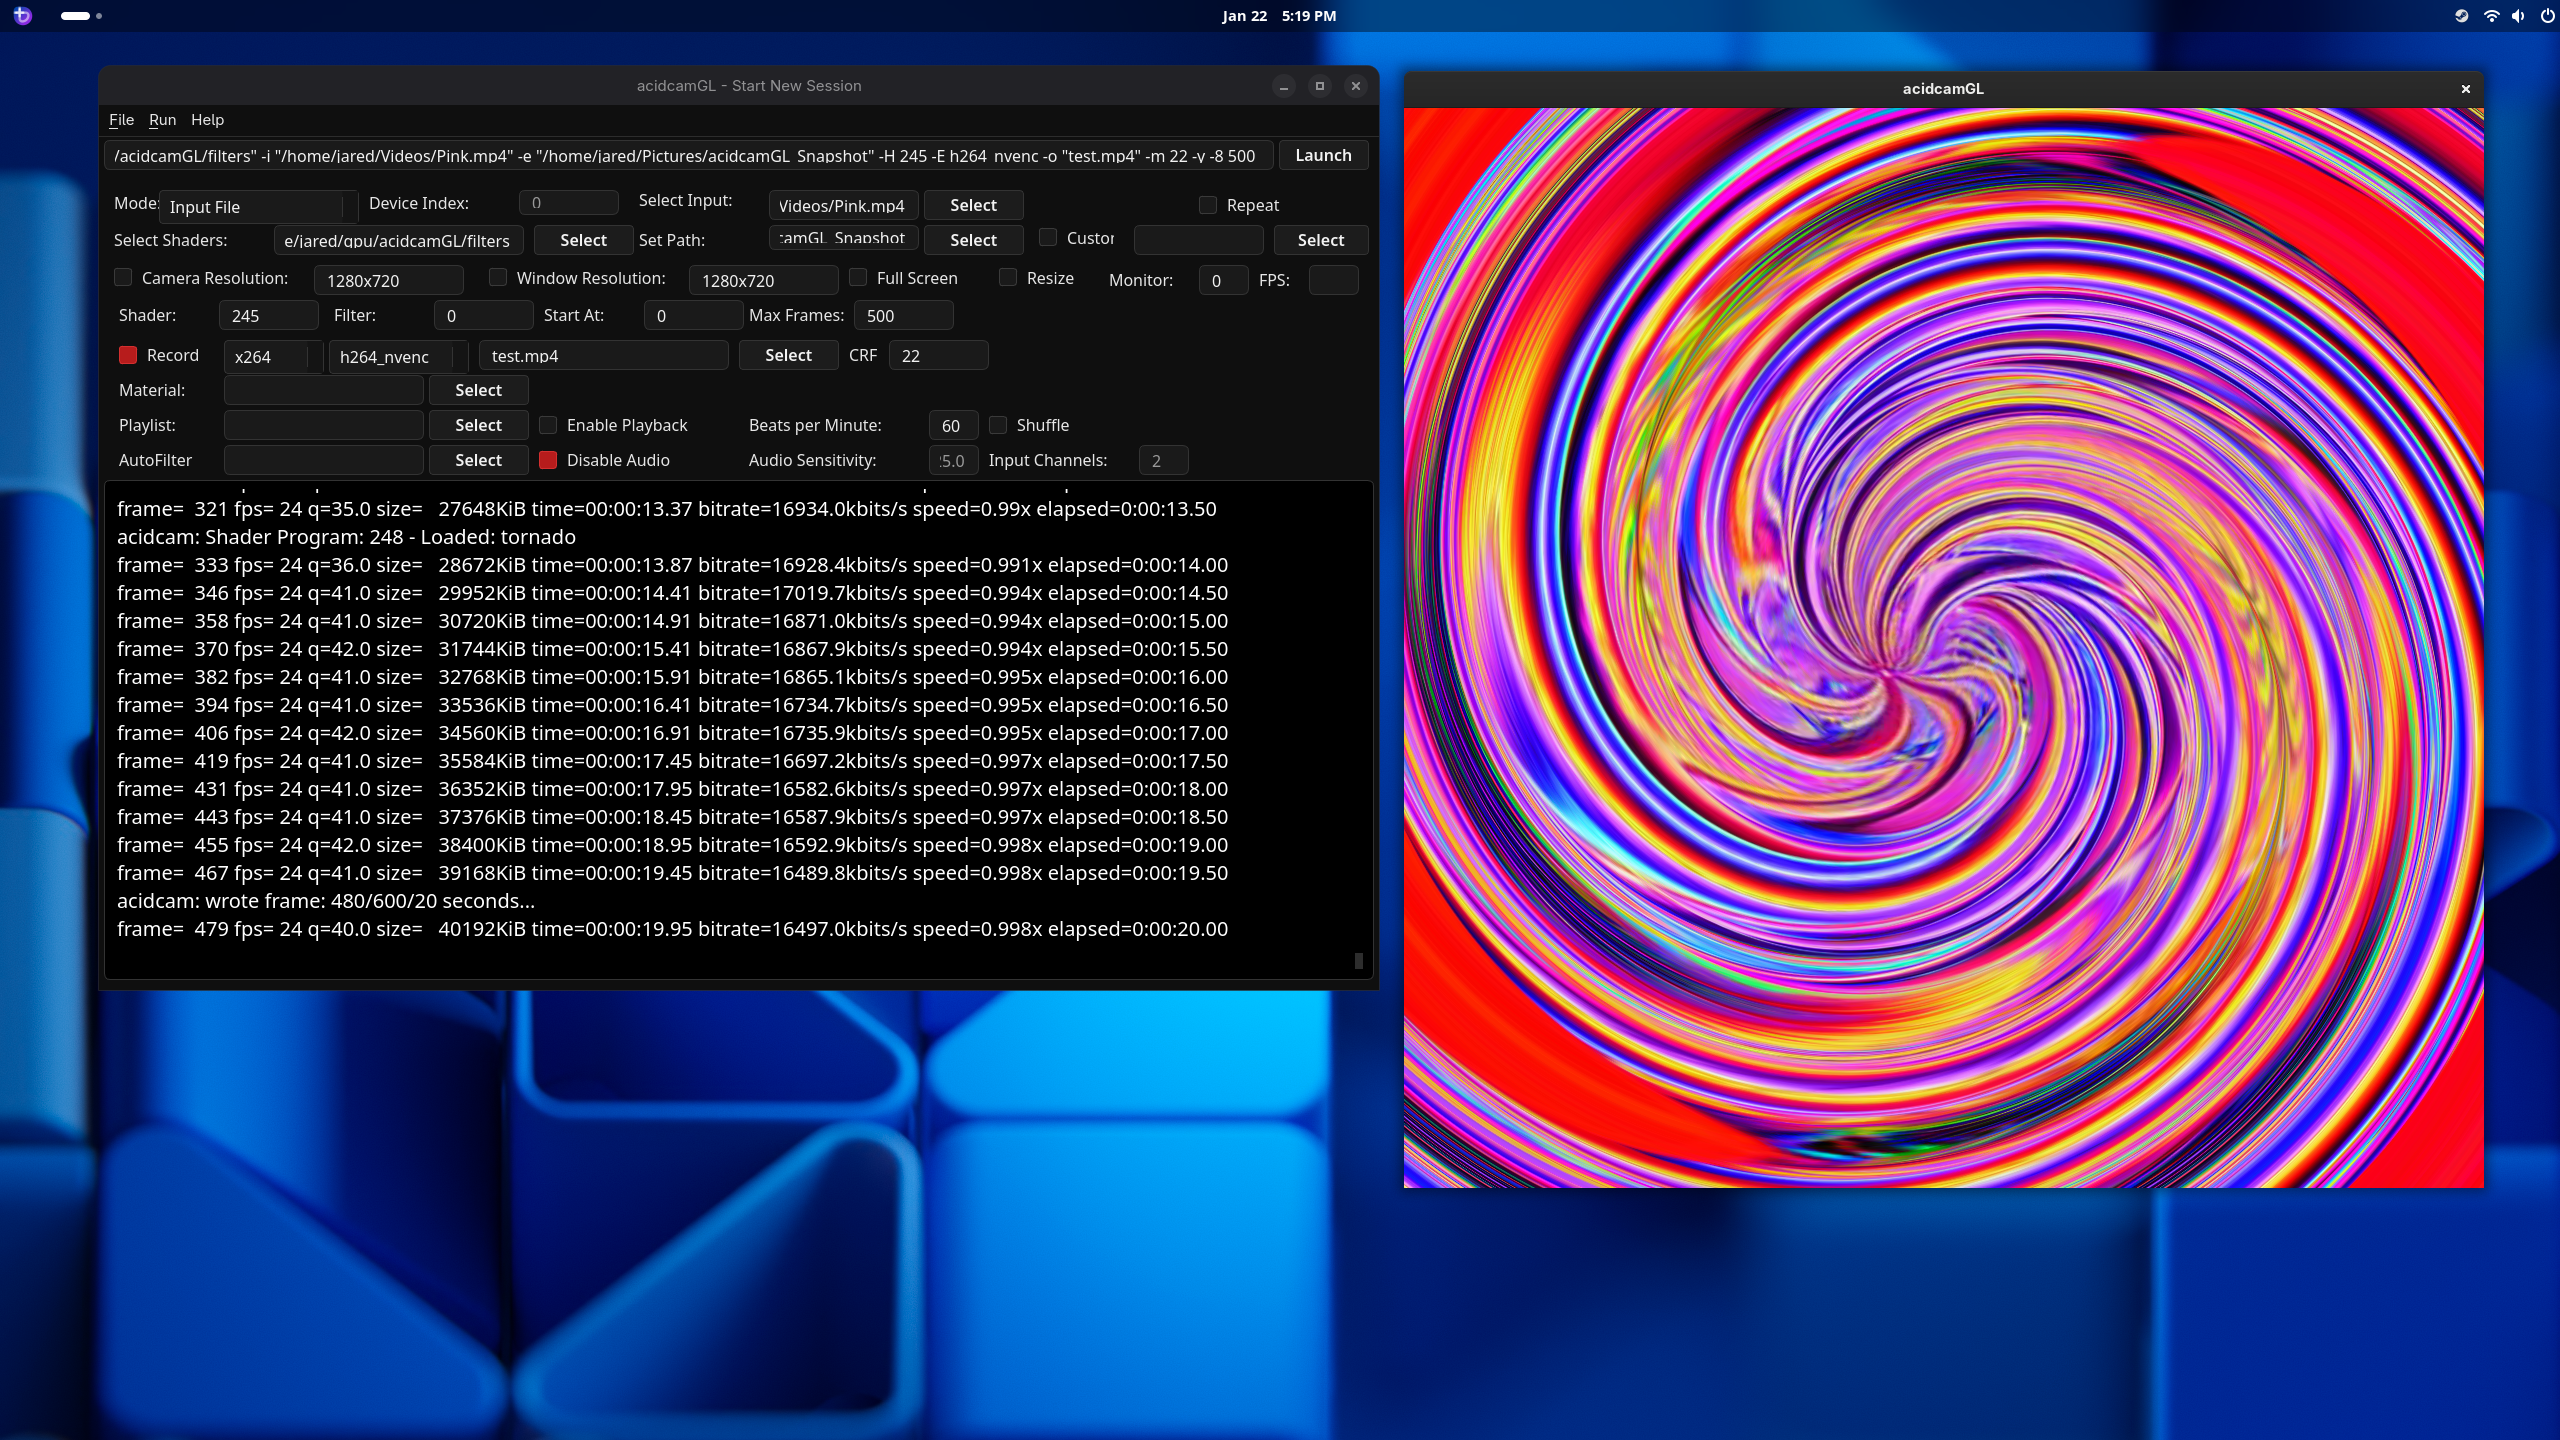
Complete Setup Guide for Real-Time Video Effects & Glitch Art
The acidcam-dev container is a pre-configured development environment that packages all the Acid Cam video effects applications along with their dependencies. This containerized approach ensures consistent behavior across different Linux distributions and eliminates the complexity of manually compiling and configuring these applications.
A powerful Qt-based video effects application with an intuitive graphical interface. Supports real-time video processing with hundreds of built-in filters and effects.
OpenGL-accelerated video effects engine providing superior performance through GPU-based rendering. Ideal for high-resolution video processing.
Specialized tool for creating glitch art and databending effects. Transform ordinary videos into striking visual experiments.
One of the most important decisions when using Acid Cam is choosing between the CUDA-enabled build and the standard build. This choice significantly impacts performance, especially when encoding video output.
CUDA (Compute Unified Device Architecture) is NVIDIA's parallel computing platform. When combined with NVENC (NVIDIA Encoder), it enables hardware-accelerated video encoding directly on the GPU.
Standard builds use software-based encoding through libraries like libx264 and libx265. All processing happens on the CPU using highly optimized algorithms.
Understanding the different encoders available helps you make the best choice for your workflow. Here's a detailed comparison:
| Encoder | Type | Hardware | Speed | Quality | Best For |
|---|---|---|---|---|---|
h264_nvenc |
Hardware (NVIDIA) | GTX 600+ | ⚡⚡⚡⚡⚡ | ★★★★☆ | Real-time encoding, streaming |
hevc_nvenc |
Hardware (NVIDIA) | GTX 900+ | ⚡⚡⚡⚡⚡ | ★★★★☆ | 4K video, smaller file sizes |
libx264 |
Software (CPU) | Any CPU | ⚡⚡☆☆☆ | ★★★★★ | Maximum quality, archival |
libx265 |
Software (CPU) | Any CPU | ⚡☆☆☆☆ | ★★★★★ | Best compression, 4K archival |
h264_vaapi |
Hardware (Intel/AMD) | Intel HD / AMD GPU | ⚡⚡⚡⚡☆ | ★★★★☆ | Intel/AMD systems |
Choose this when you have an NVIDIA GPU and need fast encoding. Perfect for:
Choose this when quality is paramount or you don't have NVIDIA hardware:
Before setting up the acidcam-dev container, ensure your system meets the following requirements:
Podman is a daemonless container engine that's compatible with Docker. It runs containers without requiring root privileges.
# Arch Linux
sudo pacman -S podman

# Ubuntu / Debian
sudo apt install podman

# Fedora
sudo dnf install podman

# Verify installation
podman --versionThe xhost command is needed to grant the container permission to display graphics on your screen.
# Arch Linux
sudo pacman -S xorg-xhost

# Ubuntu / Debian
sudo apt install x11-xserver-utils

# Fedora
sudo dnf install xorg-x11-server-utilsProper GPU drivers are essential for hardware acceleration. Install the appropriate drivers for your graphics card:
# NVIDIA (Arch Linux)
sudo pacman -S nvidia nvidia-utils

# AMD / Intel (Arch Linux - Mesa drivers)
sudo pacman -S mesa vulkan-radeon # AMD
sudo pacman -S mesa vulkan-intel # Intel

# Verify GPU access
ls -la /dev/dri/If you want to use NVENC hardware encoding, install the NVIDIA Container Toolkit:
# Add NVIDIA repository (Ubuntu/Debian)
distribution=$(. /etc/os-release; echo $ID$VERSION_ID)
curl -s -L https://nvidia.github.io/libnvidia-container/gpgkey | \
  sudo apt-key add -
curl -s -L https://nvidia.github.io/libnvidia-container/$distribution/libnvidia-container.list | \
  sudo tee /etc/apt/sources.list.d/nvidia-container-toolkit.list

# Install toolkit
sudo apt update
sudo apt install nvidia-container-toolkit

# Configure for Podman
sudo nvidia-ctk cdi generate --output=/etc/cdi/nvidia.yaml

# Verify
nvidia-ctk --versionFor live video input and real-time effects. Usually available at /dev/video0. Check with ls /dev/video*
For audio-reactive effects (if supported). Requires PulseAudio or PipeWire socket mounting.
Follow these steps to get up and running in minutes:
Download the launcher scripts from GitHub:
git clone https://github.com/lostjared/acidcam-dev.git
cd acidcam-devDownload the pre-built container image from GitHub Container Registry:
# Standard build (recommended for most users)
podman pull ghcr.io/lostjared/acidcam-dev:latest

# Check the downloaded image
podman images | grep acidcamGrant execute permissions to all launcher scripts:
chmod +x *.sh

# Verify permissions
ls -la *.shThe scripts automatically create this, but you can do it manually:
mkdir -p ~/container_share

# This folder will be accessible inside the container at:
# /home/developer/shareGrant the container permission to display on your screen:
# Allow your user (more secure)
xhost +si:localuser:$(whoami)

# Or allow all local connections
xhost +local:You're ready to go! Choose an application to run:
# Launch Acid Cam v2 Qt
./AcidCam.v2.sh

# Launch AcidCamGL
./acidcamGL.sh

# Launch Glitch GUI
./glitch.gui.shThe flagship application featuring a comprehensive Qt-based interface. Perfect for users who prefer a traditional desktop application experience with menus, toolbars, and visual controls.
# Launch command
./AcidCam.v2.sh| Feature | Description |
|---|---|
| Real-time Preview | See effects applied instantly as you adjust parameters |
| Filter Stacking | Combine multiple filters for complex effect chains |
| Camera Input | Process live webcam feed with effects |
| Video Export | Save processed videos in various formats |
| Preset System | Save and load your favorite effect combinations |
The OpenGL-accelerated version leverages your GPU for rendering effects. This provides significantly better performance, especially for complex shaders and high-resolution video.
# Launch command
./acidcamGL.shA specialized tool focused on glitch art aesthetics. Create databending effects, pixel sorting, channel shifting, and other creative digital artifacts.
# Launch command
./glitch.gui.shAll applications can access files in the shared folder. This is your bridge for importing and exporting media:
# Copy a video into the container share
cp my_video.mp4 ~/container_share/

# Inside the application, navigate to:
# /home/developer/share/my_video.mp4

# Exported files will appear in:
ls ~/container_share/Place your video files, images, or project files in ~/container_share on your host. They'll appear at /home/developer/share inside the container.
When saving or exporting from the applications, save to /home/developer/share. Files will appear in ~/container_share on your host.
Understanding video encoding is crucial for getting the best results from Acid Cam. This section explains the technical details of different encoding options.
The libx264 encoder is a highly optimized software implementation of the H.264/AVC standard. It's known for excellent compression efficiency and quality.
# Example FFmpeg command using libx264
ffmpeg -i input.mp4 -c:v libx264 -preset medium -crf 23 output.mp4

# Preset options: ultrafast, superfast, veryfast, faster, fast,
#                medium (default), slow, slower, veryslow

# CRF (quality): 0 = lossless, 23 = default, 51 = worst
# Lower values = better quality but larger files| Preset | Encoding Speed | File Size | Recommended Use |
|---|---|---|---|
| ultrafast | Fastest | Largest | Quick previews, testing |
| medium | Balanced | Balanced | General purpose (default) |
| slow | Slow | Smaller | Final renders, distribution |
| veryslow | Slowest | Smallest | Archival, maximum quality |
NVIDIA's NVENC encoder uses dedicated silicon on the GPU for video encoding. This offloads the work from your CPU and provides exceptional encoding speeds.
# Example FFmpeg command using h264_nvenc
ffmpeg -i input.mp4 -c:v h264_nvenc -preset p4 -cq 23 output.mp4

# NVENC presets (fastest to slowest):
# p1 (fastest), p2, p3, p4 (medium), p5, p6, p7 (slowest/best quality)

# CQ mode: Similar to CRF, lower = better quality
# -cq 19 is high quality, -cq 23 is good balanceHEVC (High Efficiency Video Coding) provides approximately 50% better compression than H.264 at the same quality level. However, it requires more processing power to encode and decode.
# Software HEVC encoding
ffmpeg -i input.mp4 -c:v libx265 -preset medium -crf 28 output.mp4

# Hardware HEVC encoding (NVIDIA)
ffmpeg -i input.mp4 -c:v hevc_nvenc -preset p4 -cq 28 output.mp4

# Note: HEVC uses higher CRF values for equivalent quality
# CRF 28 in HEVC ≈ CRF 23 in H.264# Solution 1: Allow X11 connections
xhost +local:
# Solution 2: Check DISPLAY variable
echo $DISPLAY # Should show something like ":0" or ":1"
# Solution 3: Export DISPLAY if not set
export DISPLAY=:0# Check GPU driver status
glxinfo | grep "OpenGL renderer"
# Verify DRI device access
ls -la /dev/dri/
# For NVIDIA, check driver version
nvidia-smi# Check for existing containers with same name
podman ps -a | grep acidcam
# Remove stopped containers
podman rm acidcam-update-dev
# Force remove if needed
podman rm -f acidcam-update-dev# Check Podman rootless setup
podman info | grep -i rootless
# Reset Podman storage if corrupted
podman system reset
# Ensure user namespaces are enabled
cat /proc/sys/kernel/unprivileged_userns_clone # Should be 1# List video devices
ls -la /dev/video*
# Check webcam with v4l2
v4l2-ctl --list-devices
# If using a different device (e.g., /dev/video2),
# modify the script: --device /dev/video2# Verify NVIDIA Container Toolkit is installed
nvidia-ctk --version
# Generate CDI specification
sudo nvidia-ctk cdi generate --output=/etc/cdi/nvidia.yaml
# Test GPU access in container
podman run --rm --device nvidia.com/gpu=all nvidia/cuda:12.0-base nvidia-smi
# Add to script if needed:
# --device nvidia.com/gpu=allnvidia-smi to check
your driver's maximum supported CUDA version.
# For PulseAudio, add to podman run command:
-v /run/user/$(id -u)/pulse:/run/user/1000/pulse

# For PipeWire:
-v /run/user/$(id -u)/pipewire-0:/run/user/1000/pipewire-0If you're still experiencing issues:
podman info, nvidia-smi (if applicable)